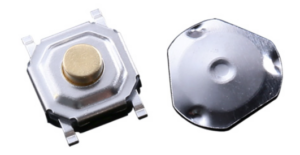
What is a PCB Switch?
A PCB switch is a key component used in electronic circuits to control the flow of electricity. These switches are mounted directly onto a printed circuit board. Common in devices like our computers, keyboards, and consumer electronics, PCB switches can turn circuits on or off, create input commands, or change settings. Because they are compact, durable, and versatile, PCB switches are highly favored in modern electronics manufacturing.
PCB switches come in various types, including tactile, mechanical, and membrane switches, each serving a specific function depending on the application.

What is a PCB?
Before diving further into PCB switches, let’s first understand the PCB itself. A printed circuit board (PCB) serves as the backbone of most modern electronics. It is a board made from a non-conductive material that supports and connects electrical components using conductive pathways (traces). These traces allow signals and power to move between different components, like resistors, capacitors, and integrated circuits.
PCBs can be single-layer, double-layer, or multi-layer, depending on the complexity of the design. The layers help in accommodating various components while ensuring that the size of the device remains compact.
How Do You Connect a Switch to a PCB?
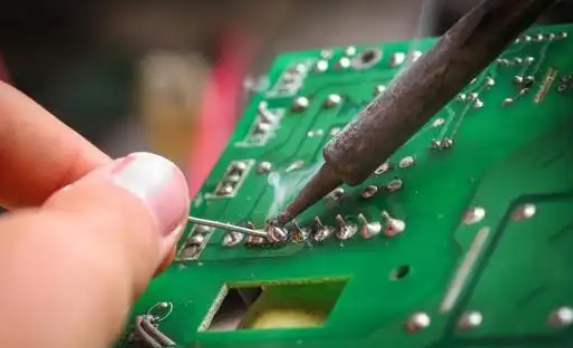
Connecting a switch to a PCB might sound complex, but with the right steps, it becomes straightforward. Most PCB switches are designed to be soldered directly to the board. Here’s how the connection process works:
1. Identify the switch terminals
Every switch has a set of terminals that either complete or break the circuit. Understanding these terminals is crucial as they dictate where the connections go on the PCB.
2. Align the switch with the PCB pads
Once the terminals are identified, align the switch with the designated pads on the PCB. These pads are usually labeled for easy identification.
3. Soldering
The next step is soldering the switch terminals to the pads. Soldering is the process of melting a metal alloy (solder) to create a secure connection between the terminal and the pad. Care should be taken to avoid overheating the switch or PCB, as this can damage the components.
4. Testing the connection
After soldering, it’s essential to test the connection to ensure the switch is properly integrated into the circuit. This can be done with a multimeter to check for continuity or using the actual power supply to verify functionality.
How Do You Test a PCB Switch?
Testing a PCB switch is necessary to ensure it functions correctly and is properly integrated into the circuit. There are a few different methods to test a PCB switch:
- Continuity Testing with a Multimeter: One of the simplest ways to test a switch is by using a multimeter set to continuity mode. Place the multimeter’s probes on the switch terminals. If the switch is working, it will complete the circuit when pressed, and the multimeter will beep or show continuity. If there is no continuity, it indicates that the switch might be faulty.
- Functional Testing in the Circuit: Another method is to test the switch while it is installed in the circuit. Power up the device and see if pressing the switch performs the expected function. For example, if it’s a power switch, check if the device turns on or off as intended.
- Visual Inspection: Sometimes, physical damage can hinder a switch’s operation. Inspecting the switch for loose connections, cracks, or corrosion can provide insights into potential failures.
- Automated Testers: In high-volume manufacturing, automated systems like flying probe testers or bed-of-nails testers are used to check multiple points on the PCB, including switches. These machines can rapidly assess the functionality of the entire board, including switches, to ensure that everything operates as expected.
Regular testing of PCB switches is crucial to catch potential issues early, preventing larger problems later in the device’s lifespan.
Are PCB Switches Hot-Swappable?
Yes, PCB switches can be hot-swappable, but it depends on the PCB design. A hot-swappable PCB allows switches to be inserted and removed without soldering, making customization and maintenance easier. These PCBs have pre-installed hot-swap sockets (like Kailh or Gateron hot-swap sockets) that hold mechanical switches securely. However, a standard soldered PCB requires desoldering and resoldering switches, making changes more difficult.
If you want hot-swappable switches, ensure the PCB supports it. Some keyboards have hybrid designs where only certain keys are hot-swappable.
PCB Switch Types
PCB switches can be categorized based on mounting style, switch type, and application:
1. Mounting Style
- PCB-Mount Switches – Have 5 pins (2 electrical + 3 plastic pins) for better stability on PCBs.
- Plate-Mount Switches – Have 3 pins (only electrical) and require a metal plate for stability.
2. Switch Type
- Mechanical Switches – Includes tactile, linear, and clicky switches (e.g., Cherry MX, Gateron, and Kailh).
- Membrane Switches – Flexible, low-profile, and common in budget keyboards.
- Optical Switches – Use light beams instead of metal contacts for faster response.
3. Application-Based
- Tactile Switches – Provide a noticeable bump when pressed, offering feedback without a loud click. Popular for typing and programming. (e.g., Cherry MX Brown, Gateron Brown)
- Linear Switches – Have a smooth keystroke with no bump or click, ideal for gaming due to their fast actuation. (e.g., Cherry MX Red, Gateron Yellow)
- Clicky Switches – Make an audible click with a tactile bump, giving strong feedback. Best for those who enjoy loud typing. (e.g., Cherry MX Blue, Kailh Box White)
- Silent Switches – Designed to reduce noise while maintaining the feel of tactile or linear switches. (e.g., Cherry MX Silent Red, Gateron Silent Brown)
Which PCB Switch Type Should You Choose?
- If you prefer customization and easy swapping, hot-swappable PCB switches are best.
- If stability is a priority, PCB-mount switches work better on compatible PCBs.
- For gaming, linear switches offer faster key response.
- For office or quiet environments, silent switches reduce noise while maintaining comfort.
PCB switches are critical for controlling electronic circuits, with options tailored to mounting styles, mechanisms, and use cases. Proper installation and testing ensure reliability, while selecting the right type enhances device performance. Whether building a keyboard or industrial equipment, understanding PCB switches empowers efficient design and maintenance.